Appearance
Cheap LLM server with 64 GB of VRAM
In this post I am going to describe how I managed to get the cheapest LLM server with 64 GB of VRAM for LLM inference. All of it cost me roughly 600 EUR, not including the 4U custom printed chassis.
Benchmarks
Let's start with benchmarks because that is what everyone is looking for.
Ollama single query
Prompt:
text
What is AMD Radeon Instinct MI50?| Model name | Model size in GB | Token generation per second |
|---|---|---|
qwen3:4b | 2.5 GB | 64.03 |
deepseek-r1:1.5b-qwen-distill-q8_0 | 1.9 GB | 104.56 |
qwen3:30b-a3b-thinking-2507-fp16 | 61 GB | 31.43 |
Llama.cpp benchmark
Model used is LLama 7B v2 instruct GGUF from https://huggingface.co/filipealmeida/open-llama-7b-v2-open-instruct-GGUF
| model | size | params | backend | ngl | test | t/s |
|---|---|---|---|---|---|---|
| llama 7B F16 | 12.55 GiB | 6.74 B | ROCm | 99 | pp512 | 607.29 ± 8.13 |
| llama 7B F16 | 12.55 GiB | 6.74 B | ROCm | 99 | tg128 | 32.41 ± 0.06 |
| llama 7B Q8_0 | 6.67 GiB | 6.74 B | ROCm | 99 | pp512 | 531.09 ± 0.21 |
| llama 7B Q8_0 | 6.67 GiB | 6.74 B | ROCm | 99 | tg128 | 51.94 ± 0.14 |
| llama 7B Q4_0 | 3.56 GiB | 6.74 B | ROCm | 99 | pp512 | 1038.92 ± 0.79 |
| llama 7B Q4_0 | 3.56 GiB | 6.74 B | ROCm | 99 | tg128 | 71.82 ± 0.13 |
Run as:
bash
$ ./build/bin/llama-bench \
  -m ./models/open-llama-7b-v2-open-instruct-GGUF/ggml-model-f16.gguf \
  -m ./models/open-llama-7b-v2-open-instruct-GGUF/ggml-model-Q8_0.gguf \
  -m ./models/open-llama-7b-v2-open-instruct-GGUF/ggml-model-Q4_0.gguf \
  -p 512 -n 128 -ngl 99
Cost
| Component | Price |
|---|---|
| 2x AMD Radeon Instinct MI50 | ~200 EUR each |
| 2x GPU fan PLB07525B12HH | 8 EUR each |
| 1x Intel Xeon E5 2680 V4 CPU | 16 EUR |
| 4x 8GB RAM | 25 EUR each |
| 1x AsRock X99 Extreme4 motherboard | 110 EUR |
| 1x LGA 2011-3 CPU cooler | 25 EUR |
| 1x 6+2 PCI-e power cables | 12 EUR |
| 1x 650W power supply | ~42 EUR |
| 1x NVMe SSD | Up to your preferences |
The total cost is around 620 EUR. You can get cheaper by choosing smaller RAM, etc. The motherboard+CPU+GPU combo is around 560 EUR. Getting 64 GB of VRAM for this price is absolutely amazing. A new GPU with 32GB of VRAM costs more than 2000 EUR.
I already had most of the components, such as the RAM and the power supply. I have upgraded one of my other systems to a newer CPU and DDR5 ram, so I had 4x 8GB sticks laying on the shelf doing nothing.
I did not count in the storage price, because that is completely up to your preferences. It can be anything from a cheap 128GB NVMe to some large array. I used an older PCI-e gen 3 NVMe as the boot drive and to store the LLM models. I also did not count in the chassis, because that is also a personal preference. I have decided to design something from scratch and 3D print it, so it fits into a server rack.
Motherboard and CPU
I did not want to spend a lot of money on this setup. I did not even know it would work. I have found a lot of used older Intel Xeon v3 and v4 CPUs on eBay and Aliexpress. Depending on the version and number of cores, they cost just only 5 EUR for the older v3 version. I have chosen the E5 2680-v4, because it has a good number of cores, a decent single thread performance, and 40 PCI-E lanes. I need 32 PCI-E lanes for the two GPUs and 4 PCI-E lanes for the NVMe drive. It is slow by today's standards, but I am not going to use this for LLM inference, only use the GPUs.
Moving on, there are a lot of X99 LGA 2011-3 motherboards. You can find a lot of Chinese brands such as Mougoi, Soyo, Machinist, Huananzhi, and so on. They are great, but the problem with these motherboards is that they do not support suspend to RAM mode. There is a lot of reviews where people complain that it does not work correctly. Sometimes the motherboard turns off completely or immediately resumes from the sleep.
If you don't care bout the suspend to RAM sleep mode, then you can get one of these motherboards. You can get a decent CPU+motherboard+RAM combo between 60 and 100 EUR. That's just an amazing price for what you are getting.
I highly recommend suspend to RAM (explained further in this post), because the card uses 25W of power when idle. That is a lot, if your eletricity is not cheap, and if you want this system to be available 24/7.
I have settled on AsRock X99 Extreme4, because I really needed the suspend to RAM to work correctly, and I needed two PCI-e x16 slots to be spaced out 3 PCIe slots away from each other. This is because of the taller GPU fans that I bought, which made the GPU cards 2.5x slots tall.
The layout of the motherboard is the following:
Source: https://download.asrock.com/Manual/X99 Extreme4.pdf page 6
In the manual, it specifies how the PCI-E lanes are organized.
Source: https://download.asrock.com/Manual/X99 Extreme4.pdf page 17
This is exactly what I need. Two full x16 slots going directly to the CPU. Many times, especially on AM4 and AM5 motherboards, the second/third/fourth PCI-E slots may go through the chipset, may be of lower generation, and may not be fully occupied (i.e. x16 slot but only 4 PCI-E lanes occupied).
For LLM inference with multi GPU setup, it is highly recommended to have a good bandwidth for both GPUs. I will settle for either 2x x8 PCI-E lanes of gen 4, or 2x x16 PCI-E lanes of gen3, but not less. Some people told me (citation needed) that going with fewer PCI-E lanes will result in slower token generation.
This is the main reason why I went with Intel Xeon and not Intel i3/i5/i7/i9 or AMD AM4/AM5. They simply do not have enough PCI-E lanes, and most of such motherboards do not support PCI-E bifurcation (splitting a x16 slot into two x8 slots), unless they are expensive server motherboards.
Another option would be AMD EPYC or AMD Threadripper. However, they cost more, and I would not gain anything more than what I already have with this X99 platform. The CPU is going to be idle most of the time anyway. The X99 wins the price/performance ratio by a lot.
Problem 1: GPU fan
The GPUs I am using is 2x AMD Radeon Instinct MI50. Each one has 32GiB of VRAM. The cards are older and cheap on Aliexpress or on Alibaba. They do not have a lot of compute power, but they have 1 TB/s of memory bandwidth.
They do not have a cooling fan, like you would find on a desktop GPU. They are meant for servers where the fans at the front of the server chassis push the air to the card from the front. I will have to figure out how to add a fan into it.
I also had to disassemble the card and re-paste it.
I have used the following 3D model to print the shroud for the card that can hold a turbine style fan: https://makerworld.com/en/models/1443230-amd-radeon-instinct-mi50#profileId-1502520
I have accidentally bought a larger taller version of the fan, so I had to modify the model to fit them. The fans are 35mm tall. The card, with the shroud, is occupying 2.5x PCIe slots.
The fan used is of type: PLB07525B12HH, bought from here: https://www.aliexpress.com/item/4000627404530.html
Once assembled, it looks like this:
Problem 2: Boot loops due to PCI-e version
I had to disconnect the AMD GPUs and put in a temporary desktop GPU (GTX 1070).
The AMD GPUs have 16x gen 4 PCI-e lanes, but the X99 motherboard only supports gen 3. Leaving the PCI-e version to auto in the BIOS will cause the system not to boot, or be able to detect the cards. I had to explicitly set the version to gen 3.
Problem 3: Boot loops due to disabled 4G decoding
The system would not boot and would restart after few seconds automatically. I had to go to the BIOS settings and enable 4G decoding. After that the system booted just fine. This is disabled by default.
Problem 4: PCI-e memory mapping error
You will probably see this error if you are using an older motherboard, like me with AsRock X99
text
$ sudo dmesg | grep amdgpu
[    1.676238] [drm] amdgpu kernel modesetting enabled.
[    1.676337] amdgpu: CRAT table not found
[    1.676340] amdgpu: Virtual CRAT table created for CPU
[    1.676350] amdgpu: Topology: Add CPU node
[    1.676545] amdgpu 0000:04:00.0: enabling device (0100 -> 0102)
[    1.676622] amdgpu 0000:04:00.0: amdgpu: Trusted Memory Zone (TMZ) feature not supported
[    1.676626] amdgpu 0000:04:00.0: amdgpu: Fatal error during GPU init
[    1.676652] amdgpu: probe of 0000:04:00.0 failed with error -12
This can be fixed by updating grub options by adding pci=realloc
text
# File: /etc/default/grub
GRUB_CMDLINE_LINUX_DEFAULT="quiet splash pci=realloc"
then:
bash
$ sudo update-grubAfter the restart the GPU driver starts correctly.
Problem 5: Older version of ROCm 6.3
The ROCm 6.4 and newer have removed the support for this GPU. Therefore, the ROCm 6.3.3 is the last one that we can use.
Based on the requirements from here: https://rocm.docs.amd.com/projects/install-on-linux/en/docs-6.3.3/reference/system-requirements.html the latest supported OS is Ubuntu 24.04.2 or Debian 12. I am most familiar with Debian-like systems, so I was going for Ubuntu or Debian. I have chosen Ubuntu 24.04.3, because that was the LTS option at the time of writing this post.
Installing the ROCm the usual way will install the newer ROCm, which no longer has the support for this GPU. You have to install an older version. Use the following steps below:
Get the repository key.
bash
$ wget https://repo.radeon.com/rocm/rocm.gpg.key
$ sudo gpg --dearmor -o /etc/apt/trusted.gpg.d/rocm.gpg < rocm.gpg.key
$ rm rocm.gpg.key
Update your sources list to include the ROCm 6.3.3 repository.
text
# File: /etc/apt/sources.list.d/rocm.list
deb [arch=amd64] https://repo.radeon.com/rocm/apt/6.3.3 jammy main
Update your packages.
bash
$ sudo apt updateAfter the update, you should see the ROCm 6.3.3 packages available.
bash
$ sudo apt-cache search rocm-core
rocm-core - Radeon Open Compute (ROCm) Runtime software stack
rocm-core-rpath6.3.3 - Radeon Open Compute (ROCm) Runtime software stack
rocm-core6.3.3 - Radeon Open Compute (ROCm) Runtime software stack
And install.
bash
$ sudo apt install rocm-hip-sdk6.3.3 rocm-dev6.3.3 rocm-utils6.3.3Reboot, and after that you should see this:
bash
$ rocm-smi

=========================================== ROCm System Management Interface ===========================================
===================================================== Concise Info =====================================================
Device  Node  IDs              Temp    Power     Partitions          SCLK    MCLK    Fan     Perf  PwrCap  VRAM%  GPU%
              (DID,     GUID)  (Edge)  (Socket)  (Mem, Compute, ID)
========================================================================================================================
0       1     0x66a1,   47843  27.0°C  18.0W     N/A, N/A, 0         930Mhz  350Mhz  14.51%  auto  225.0W  0%     0%
1       2     0x66a1,   37306  29.0°C  21.0W     N/A, N/A, 0         930Mhz  350Mhz  14.51%  auto  225.0W  0%     0%
========================================================================================================================
================================================= End of ROCm SMI Log ==================================================
The funny thing is that it shows a fan speed at 14.51% but there is no fan connected. There is not even a fan connector. Perhaps a default value? It's not stopping us, just an interesting observation.
Problem 6: Fan control
The GPU does not have a fan connector. I had to connect the fans to the motherboard. Obviously, the fan speed will not be controlled by the GPU temperature. In the BIOS, I can only choose manual speed, or auto speed by CPU temperature.
After I have installed lm-sensors and scanned the sensors, I was able to control the fan speed manually via:
text
echo "1" | sudo tee /sys/devices/platform/nct6775.656/hwmon/hwmon2/pwm4_enable
echo "255" | sudo tee /sys/devices/platform/nct6775.656/hwmon/hwmon2/pwm4

echo "1" | sudo tee /sys/devices/platform/nct6775.656/hwmon/hwmon2/pwm1_enable
echo "90" | sudo tee /sys/devices/platform/nct6775.656/hwmon/hwmon2/pwm1
Note, that the path may be different for you, depending on the Linux kernel version, driver version, and the motherboard sensors chip.
The pwm4 corresponds to chassis fan 2, which is not PWM enabled (3-pin connector). I set it to enabled, which allows manual control, and set the speed to 255. This sets the DC voltage, not the PWM duty cycle.
The pwm1 corresponds to chassis fan 1, which is PWM enabled (4-pin connector). I set it to 35% (90/255) duty cycle.
One GPU fan is connected to the 3-pin connector fan 1, the second GPU is connected to the 4-pin connector fan 2. However, I have connected the wiring in a way that the fan 2 PWM wire controls both GPU fans. Because each fan can draw up to 1.2A, I did not want to connect both to the same fan connector. It would likely burn it out.
The wiring is the following:
It is trivial to query GPU temperature via rocm-smi --showuse -t --json, take the max of the temperatures, apply your own fan curve, and simply write the value (text, not binary) to the /sys/devices/platform/nct6775.656/hwmon/hwmon4/pwm1 file. A few lines in a Python script can do that.
Problem 7: Kernel issues
If you have encountered this problem when running Ollama:
text
ROCm error: invalid argument
  current device: 0, in function ggml_backend_cuda_device_get_memory at //ml/backend/ggml/ggml/src/ggml-cuda/ggml-cuda.cu:2740
  hipMemGetInfo(free, total)
//ml/backend/ggml/ggml/src/ggml-cuda/ggml-cuda.cu:70: ROCm error
See: https://github.com/ollama/ollama/issues/9302
Or this error when running vLLM:
text
RuntimeError: HIP error: invalid argument
HIP kernel errors might be asynchronously reported at some other API call, so the stacktrace below might be incorrect.
For debugging consider passing HIP_LAUNCH_BLOCKING=1.
Compile with TORCH_USE_HIP_DSA to enable device-side assertions.
See: https://github.com/ROCm/ROCm/issues/3246
Then you are likely using an older Kernel 5.x on Ubuntu 22 (or similar). Upgrading to newer kernel and/or to Ubuntu 24 TLS solves the problem. I have not tested Debian 13, but based on the ROCm docs only Debian 12 is supported. I would recommend Ubuntu 24 for a painless ROCm installation.
Software: Ollama
Installing Ollama was painless. I have used the official recommended way, no modifications.
bash
$ curl -fsSL https://ollama.ai/install.sh | shAfter that the ollama starts as a systemd service and in the logs we can see that it recognised the GPUs:
bash
$ sudo journalctl -xu ollama.service | less
Oct 07 15:20:43 homelab-llm-01 ollama[1110]: time=2025-10-07T15:20:43.585Z \
    level=INFO source=types.go:131 msg="inference compute" \
    id=GPU-abe888a17348c2f5 library=rocm variant="" compute=gfx906 \
    driver=0.0 name=1002:66a1 total="32.0 GiB" available="32.0 GiB"
Oct 07 15:20:43 homelab-llm-01 ollama[1110]: time=2025-10-07T15:20:43.585Z \
    level=INFO source=types.go:131 msg="inference compute" \
    id=GPU-930a396173497dfc library=rocm variant="" compute=gfx906 \
    driver=0.0 name=1002:66a1 total="32.0 GiB" available="32.0 GiB"
For reference, here is all of the OS and software versions used:
bash
$ lsb_release -a
No LSB modules are available.
Distributor ID: Ubuntu
Description:    Ubuntu 24.04.3 LTS
Release:        24.04
Codename:       noble

$ uname -a
Linux homelab-llm-01 6.8.0-85-generic #85-Ubuntu SMP PREEMPT_DYNAMIC Thu Sep 18 15:26:59 UTC 2025 x86_64 x86_64 x86_64 GNU/Linux

$ ollama --version
ollama version is 0.12.3

$ rocm-smi --version
ROCM-SMI version: 3.0.0+94441cb
ROCM-SMI-LIB version: 7.4.0

$ apt list --installed | grep rocm-core
rocm-core6.3.3/noble,now 6.3.3.60303-74~24.04 amd64 [installed,automatic]
Let's start with something simple, for testing purposes:
bash
$ ollama run --verbose qwen3:4btext
>>> What is AMD Radeon Instinct MI50?
[...]
otal duration:       23.061657181s
load duration:        153.873293ms
prompt eval count:    20 token(s)
prompt eval duration: 215.301897ms
prompt eval rate:     92.89 tokens/s
eval count:           1453 token(s)
eval duration:        22.690835589s
eval rate:            64.03 tokens/s
To double check that the GPU was used, check the VRAM usage:
bash
$ rocm-smi --showmemuse

============================ ROCm System Management Interface ============================
=================================== Current Memory Use ===================================
GPU[0]          : GPU Memory Allocated (VRAM%): 10
GPU[0]          : GPU Memory Read/Write Activity (%): 0
GPU[0]          : Memory Activity: N/A
GPU[0]          : Not supported on the given system
GPU[1]          : GPU Memory Allocated (VRAM%): 0
GPU[1]          : GPU Memory Read/Write Activity (%): 0
GPU[1]          : Memory Activity: N/A
GPU[1]          : Not supported on the given system
==========================================================================================
================================== End of ROCm SMI Log ===================================
Looks good.
The memory is not split 50/50 between both GPUs. This is a limitation of Ollama. But good enough for my usage.
Software: llama.cpp
I had to compile Llama.cpp from scratch. I have used the following instructions below:
bash
$ sudo apt install hipblas-dev6.3.3 rocblas-dev6.3.3 miopen-hip-dev6.3.3 rocm-dev6.3.3 hip-dev6.3.3
$ sudo apt install libcurl4-openssl-dev

$ export ROCM_PATH=/opt/rocm
$ export HIP_PATH=/opt/rocm

$ git clone https://github.com/ggerganov/llama.cpp
$ cd llama.cpp

$ cmake -B build -DGGML_HIP=ON -DGGML_HIPBLAS=ON -DAMDGPU_TARGETS=gfx906 -DCMAKE_BUILD_TYPE=Release
$ cmake --build ./build/ --target llama-bench -j 14
Software: vLLM
Thankfully a lot of people already did the hard work of compiling vLLM with ROCm 6.3 in GitHub repo: https://github.com/nlzy/vllm-gfx906 which can be run as a Docker container:
bash
$ docker run -it \
  --rm \
  --shm-size=2g \
  --device=/dev/kfd \
  --device=/dev/dri \
  --group-add video \
  -p 8000:8000 \
  nalanzeyu/vllm-gfx906:v0.9.0-rocm6.3
and then:
bash
vllm serve "Qwen/Qwen3-1.7B" --max-model-len 8192 -tp 2Bonus: Securing Ollama with an API key
Install Nginx via sudo apt install nginx and add the following configuration file below:
text
# File: /etc/nginx/conf.d/ollama.conf
server {
    listen 80 default_server;
    listen [::]:80 default_server;
    server_name _;

    location / {
        if ($http_authorization != "Bearer YOUR_API_KEY_HERE") {
            return 401 "Unauthorized";
        }

        if ($request_method = 'OPTIONS') {
            return 204;
        }

        proxy_set_header  Host "localhost";
        proxy_set_header  X-Real-IP "127.0.0.1";
        proxy_set_header  X-Forwarded-For "127.0.0.1";
        proxy_set_header  X-Forwarded-Proto $scheme;
        proxy_pass        http://localhost:11434;

        proxy_set_header Upgrade $http_upgrade;
        proxy_set_header Connection "upgrade";

        proxy_connect_timeout 600s;
        proxy_send_timeout 600s;
        proxy_read_timeout 600s;
    }
}
My server only runs Ollama and nothing else, therefore I have deleted /etc/nginx/sites-enabled/default and set the above configuration to be the default via default_server with server_name _. The server name of _ is a wildcard and matches any host. Otherwise, you would need to send a Host: <server_name> header.
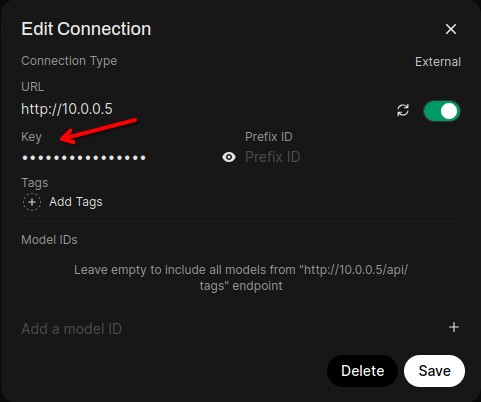
After this you can go to Open-WebUI admin panel, add Ollama URL (http with port 80), and add the API key.
Suspend to RAM
The GPUs hover around 25W when idle. This is a lot, especially when I want this server to be available 24/7. Electricity is expensive.
I have found this project: https://github.com/darksworm/go-wol-proxy which is a http proxy that sends wake-on-lan packet automatically when a request comes in. I can deploy this on a Raspberry Pi including the Open WebUI.
When I start interacting with the Open WebUI, the proxy sends WOL packet and wakes up the LLM server. Waking from RAM is faster than booting from a powered off state. In my setup it takes up to 8 seconds for the Ollama to be able to receive requests. I suspect that most of that time is to do with DHCP, but I did not investigate further. Overall I am very happy with the 8 seconds wakeup time.
WARNING
Please be aware that if you suspend to RAM, you may OOM due to GPU VRAM. Suspend to RAM will try to copy VRAM into RAM. My VRAM is 64GB, but my RAM is 32GB, you can see the problem.
The way to fix this is to ensure that all LLM models are removed from VRAM before the system goes to sleep. Or maybe a script to check whether the VRAM usage is 0% and then suspend?
See https://wiki.archlinux.org/title/Power_management#Hooks_in_/usr/lib/systemd/system-sleep, more particularly the script example in /usr/lib/systemd/system-sleep/, if you need to write a script to run before the system goes to sleep.
Conclusion
This setup definitely has the best price/performance ratio.
I have also checked out Nvidia Tesla cards. They are slightly more expensive than AMD Radeon Instinct MI50, but they have 1/4 of the memory bandwidth compared to MI50. Cost-wise they are not great.
These AMD cards are cheap because not many people want them. There is a good reason on why. These cards do not have a fan, have been deprecated in the newer ROCm versions, and are not trivial to set up. Most of the pre-built software and tutorials you will find on the internet is for Nvidia. AMD is pushing for ROCm implementations, and they are actively supporting open source projects, but only for the newer ROCm which no longer has support for the MI50 cards.
However, if you can spend the time and have the skill to tinker, this setup is definitely worth it.